بصمة أمان الشريك الذي يهتم بك، نحن مؤسسة خاصة مُرخصة من قِبَل " وزارة التجارة " ونُقدم لك أفضل تجربة في مجال الأمن الرقمي والمخاطر الرقمية التي تسيء لسمعتك الإلكترونية أو سمعة أفراد عائلتك من خلال مجموعة واسعة من الخدمات التقنية، كما نتميز بالشراكة مع نخبة من المحامون القانونيون لتغطية الجوانب القانونية المتعلقة بذلك.
التتبع اللحظي للمحتوى المسيء
دعم فني على مدار 24 ساعة / 7 أيام
توفير كوادر مؤهلة للمساعدة
أسعارنا في متناول الجميع
من نحن
بصمة أمان منشأة خاصة مرخصة من قِبَل وزارة التجارة تعمل وفقًا لأنظمة المملكة العربية السعودية لتحليل البيانات والمعلومات عبر تقنيات الذكاء الاصطناعي وتعلم الآلة في عمليات البحث المتقدمة وتتبع أكثر من 200,000,000 مصدر مفتوح للمعلومات عبر الإنترنت، رائدة في مجال تحليل النظم وتقنية المعلومات و متخصصة في تقديم الحلول والخدمات التقنية في مجالات متعددة والعمل على تمثيل العملاء إجرائيًا ونظاميًا لدى منصات (مقدمي الخدمة) لحذف المحتويات المسيئة والغير قانونية من خلال كادر تقني مؤهل بالشراكة مع نخبة من المحامين لتغطية جميع الجوانب القانونية المتعلقة بذلك.
نقدم لعملاءَنا نظاميًا وإجرائيًا خدمات متنوعة في معالجة أزمات السمعة الرقمية والمخاطر الإلكترونية، بأعلى معايير الجودة والخصوصية والأمان والاحترافية المهنية والسرعة في إنجاز الخدمة المطلوبة.
حذف الصور والفيديوهات الخاصة نظاميًا وإجرائيًا
يعملون خبراء بصمة أمان باتخاذ الإجراءات اللازمة والنظامية لحذف الصور والفيديوهات المسيئة وذلك وفقًا للشكل الإجرائي المُتبع لدى المنصة مقدمة الخدمة الرقمية بإحترافية وسرية تامة.
نمتلك فريق تقني متخصص ذو خبرة فنية وتقنية يعمل يوميًا على مدار الـ 24 ساعة في خدمتكم يتميز بكفاءة عالية للعمل على تحليل ومراقبة ومتابعة أكثر من 200 مليون مصدر المفتوح عبر الإنترنت بشكلٍ لحظي ووضع تنبيه فوري؛ لحذف المحتويات المسيئة التي تتضمن معلومات شخصية وتنتهك الخصوصية وفقًا للشكل الإجرائي المُتبع لدى المنصة مقدمة الخدمة الرقمية لتجنب مخاطر الابتزاز الإلكتروني والتشهير والتنمر أو المخاطر الأخرى الواردة منها.
تقديم خدمات قانونية للحماية من الجرائم المعلوماتية.
علاقات مع مكاتب لغات وترجمة معتمدين.
تقديم المساعدة النظامية فيما يخص الجرائم المعلوماتية والقرصنة الغير أخلاقية.
المهارات المهنية
تمثيل الغير.
الاستشارات القانونية و الشرعية.
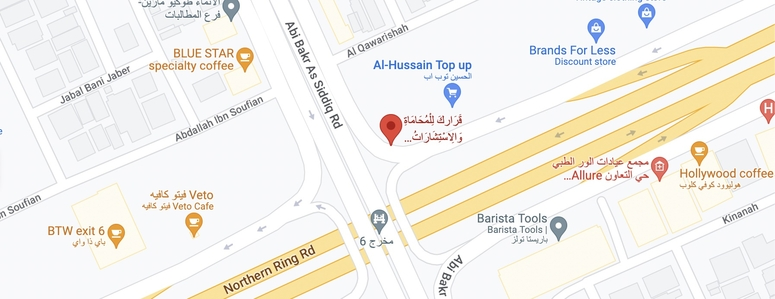
مقر شريكنا القانوني
الملك عبدالعزيز, الوادي, الرياض 13313, المملكة العربية السعودية
لماذا بصمة أمان
لأننا ندرك حجم وخطورة القرصنة الإلكترونية والهجمات الغير أخلاقية ومضار الابتزاز الإلكتروني والتشهير التي يتعرض لها الأفراد والشركات، فنحن نستخدم أحدث التقنيات المتطورة لتحليل البيانات الضخمة كالذكاء الاصطناعي وتعلم الآلة لتحليل الأنظمة والمعلومات لحظيًا للعمل على مساعدتهم في معالجة ذلك في أسرع وقت وفي خصوصية وأمان.
السـرية التامـة
نوفر الحماية اللازمة لعملاءَنا مع الحفاظ التام على خصوصيتهم وسرية بياناتهم ومعلوماتهم، وذلك من خلال اتباع أفضل وأحدث وسائل الحماية وأقصى درجات التدابير اللازمة.
سرعة الانجاز
نسعى إلى تحقيق الأمان لعملاءَنا من خلال الدقة في تقديم الخدمات وسرعة الإنجاز، والتواصل معهم بعد مساعدتهم في معالجة المخاطر التي تعرضوا لها.
أمان لك ولسمعتك
كوادر مؤهلة تقنية وقانونيًا مؤهلين لمساعدتك، ومتواجدون لدعمكم وتوجيهك بما يوفر لك الأمان والحماية.
أراء العملاء
نحرص على التفاعل مع آراء العملاء والرد على جميع استفساراتهم من أجل تقديم الخدمات لهم بشكل أفضل، وقياس المصداقية لضمان مستوى عالي من الجودة.
" الصراحة اسم ع مسمى سرعة ف الاداء وسرعة ف الاستجابة وسرعة ف التنفيذ والحرص والتجاوب السريع شكرا بصمة امان من جد ماتوقعت ف البداية لكن اذهلوني بخدماتهم"
" بصمة أمان , ثقة ثقة ثقة ثقة ثقة ثقة ثقة عالية جداً أمان اسم على مسمى ومعلوماتكم في أمان تام عطوهم مشكلتكم ويخلصونها بسرعة عالية جداً جداً , بصراحة في البداية ما توقعت بيخدموني بهالسرعة وحرصهم على خدمة العميل والسرعة على رد الأسئلة والسرية التااااااااامــة عطهم مشكلتك وانت مغمض , شباب خدووووووم."
" شكرا جزيلا تم المساعده في الموضوع بسرعه جدا وكمان أخبرني اني افضل معاه على تواصل ممتاز جدا جدا الله يجزيه الف خير"
نجيبك على كافة استفساراتك التي قد تساعدك على حل مشكلتك بكل سهولة وبسرية تامة.
هل بصمة أمان تتبع لأيّ جهة حكومية أم أنكم مؤسسة خاصة؟
لاتتبع مؤسسة “بصمة أمان للأمن السيبراني” لأيّ جهة حكومية أو أمنية متخصصة في مكافحة الجرائم المعلوماتية وننصح باللجوء إليهم في حال تعرضك لأيّ من مخاطر الجرائم المعلوماتية ، نحن مؤسسة خاصة معتمدة ومرخصة من قِبَل وزارة التجارة، ومتخصصة في مساعدة المتضررين من الأذى الإلكتروني على تخطي ومعالجة ذلك بسرعة لدى منصات مقدمي الخدمة الرقمية وبأعلى معايير الجودة والخصوصية والأمان والسرية.
هل تتبع مؤسسة بصمة أمان لهيئة الأمر بالمعروف والنهي عن المنكر أو تطبيق كلنا أمن؟
لا، فنحن نقدم الخدمات التقنية لتوفير بيئة آمنة في منصات التواصل الاجتماعي ومعالجة المشاكل التقنية والسعي لحلها وفق الأنظمة والقوانين الرسمية لتلك البرامج عبر خبراء تقنيين مؤهلين ومتخصصين.
هل بصمة أمان مؤسسة رسمية مرخصة؟
نعم، نحن مؤسسة رسمية معتمدة ومرخصة من قِبَل وزارة التجارة بالمملكة العربية السعودية.
ما هي الخدمات التي تقدمها مؤسسة بصمة أمان للأمن السيبراني؟
تقدم مؤسسة بصمة أمان للأمن السيبراني العديد من الخدمات المتعلقة بمعالجة الأذى الإلكتروني وأمن المعلومات وذلك من قِبَل فريق عمل محترف وخبير.
ما هي الميزات التي تتمتع بها بصمة أمان للأمن السيبراني في حل مشكلات الأذى الإلكتروني والسمعة؟
من أهم ما يميز مؤسسة “بصمة أمان للأمن السيبراني” عند الاضطلاع بمسؤولية علاج الأذى الإلكتروني الذي يتعرض له شخص أو شركة هو السرية التامة والمحافظة على بيانات العميل إلى أقصى درجة ممكنة مع السرعة في تقديم الحلول التقنية؛ لوجود تقنيين محترفين متخصصين في تلك الأمور، وبالإضافة لكل ذلك فأسعار خدماتنا منافسة وحصرية.
هل يقوم فريق العمل في بصمة أمان بتهكير الحسابات أو ما يُسمى بالاختراق؟
لا، فالاختراق جريمة معلوماتية تخالف نظام مكافحة الجرائم المعلوماتية في المملكة العربية السعودية، بل نقوم بحل مشكلتك عبر تواصل خبراءَنا المؤهلين والمتخصصين مع إدارة البرنامج التي تواجه المشكلة به بأسرع وقت ممكن والقيام بحل مشكلتك بسرية تامة، دون اختراق أو مخالفة لنظام الجرائم المعلوماتية.
هل قمتم من قبل بحل مشاكل الابتزاز والتهديد الإلكتروني؟
بالطبع، فقد نجحنا والحمد لله في إنهاء العديد من مشكلات الابتزاز بمعالجتها تقنيًا وبسرية تامة من خلال خبراءَنا.
هل يمكنكم حل مشكلة الابتزاز لدي فورًا ؟
نحن في “بصمة أمان للأمن السيبراني” نقدم أعلى قدر من السرعة في معالجة الابتزاز تقنيًا ومن ثم فنحن نولي مشكلتك أقصى قدر من الاهتمام ونسعى لحلها في غضون 24 ساعة.
هل تحافظون على سرية بياناتي وخصوصيتي؟
هذا من أركان عملنا، فنحن نلتزم بتقديم أعلى قدر من السرية للحفاظ على خصوصية عملاءَنا وسرية بياناتهم وإجراءاتنا صارمة جدًا في هذا الأمر.
هل يمكنكم استرجاع حسابي الذي تم اختراقه في أحد منصات التواصل الاجتماعي؟
نعم، يمكننا استرجاع حسابك المخترق حتى وإن تم تغيير بياناته كلها، بل وحتى إن قام المخترق بتفعيل خاصية التحقق بخطوتين، وذلك وفق الشروط والأحكام لإثبات ملكيتك للحساب مع التزامنا التام والدائم بسرية البيانات.
هل يمكنكم حذف حساب شخص ينتحل شخصيتي في أحد منصات التواصل الاجتماعي ؟
نقوم بالتواصل مع منصة التواصل المقدمة للخدمة ونمثلك فيها لحذف ذلك الحساب المنتحل بشكل احترافي وبأسرع وقت ممكن.
هل يمكنكم حذف الصور والفيديوهات التي تسيء لسمعتي؟
نقوم بتمثيلك لدى المنصة المنشور عليها المحتوى المسيء ونتواصل معهم بشكل احترافي لحذف تلك الصور أو الفيديوهات المسيئة وفي أسرع وقت.
هل يمكنكم حذف حساب الشخص المتوفي من على منصات التواصل الاجتماعي ؟
يمكننا التواصل بشكل احترافي مع منصات التواصل الاجتماعي الموجود عليها حساب المتوفي لحذفه في أسرع وقت وفق الشروط والأحكام لإثبات أنه متوفي مع التزامنا التام بسرية البيانات.
هل يمكنكم استرجاع رقم هاتفي الذي تعرض للاختراق في برنامج الواتس آب؟
نعم، حيث نقوم بتعطيل الرقم لمدة 24 ساعة، وبعد ذلك يمكنك استعادة الرقم بسهولة، وفق الشروط والأحكام لإثبات أن الرقم لك ونلتزم التزام تام بسرية البيانات.
هل يمكنكم استرجاع حسابي الموقوف مؤقتًا في أحد منصات التواصل الاجتماعي؟
نعم يمكننا استرجاع حسابك الموقوف مؤقتًا في منصة التواصل الاجتماعي وفق الشروط والأحكام في حين عدم مخالفتك لقوانين تلك المنصة وإثبات ملكيتك للحساب مع التزامنا التام بسرية البيانات.
هل ينحصر نطاق خدماتكم في معالجة الابتزاز الإلكتروني وغيره من مشاكل السمعة داخل المملكة العربية السعودية فقط؟
لا بالطبع، حيث يمكننا معالجة الابتزاز الإلكتروني ومشكلات السمعة وبسرية تامة لعملاءَنا في جميع أنحاء العالم وليس داخل المملكة العربية السعودية فقط، وذلك من خلال شبكة العلاقات الدولية التي نتمتع بها وقدرة فريقنا التقني على تقديم خدمات تقنية فيما يتعلق بذلك على أعلى قدر من الاحترافية ، وفق القوانين المعمول بها في كل دولة.
هل تحتفظ مؤسسة بصمة امان بالبيانات الشخصية أو الهوية الشخصية او ما شابه ؟
لا ، نحن لا نحتفظ ببيانات شخصية او هوية شخصية او ما شابه مطلقاً لكوننا لانحتاج لذلك ، كما أنه مخالف للأنظمة والتعليمات الصادرة في هذا الخصوص .
بصمة أمان لا تتبع لأيّ جهة أمنية أو هيئة حكومية ممن هم متخصصين في مكافحة الابتزاز أو الجرائم المعلوماتية وننصح باللجوء إليهم في حال تعرضك لذلك، ونحن مؤسسة تقنية خاصة مرخصة من قِبَل وزارة التجارة، ومتخصصة في مساعدة الأفراد والشركات المتضررين من الأذى الإلكتروني والقرصنة الغير أخلاقية على تخطي ومعالجة ذلك بسرعة لدى منصات مقدمي الخدمة بأعلى معايير الجودة والخصوصية والأمان والسرية.